Add GCPs
The ground control points provide accurate survey of an field during growth season, and can be added into system through the web interface and used in the stitching software after flight path is extracted.
The Flight path and Add GCPs panels should be open in the left toolbar with the viewable flight path on the map.
Add/Change EPSG
EPSG Geodetic Parameter Dataset (also EPSG registry) is a public registry of spatial reference systems, Earth ellipsoids, coordinate transformations and related units of measurement. EPSG reference list can be found from spatialreference.
- If your GCPs are latitude and longitude, The EPSG might be
4326with WGS84. Check with your GCPs providers. - If you use
AeroPoints as GCPs, you can download
CSV (Simple)format from propeller website and find the EPSG in the sectionCoordinate Systems.
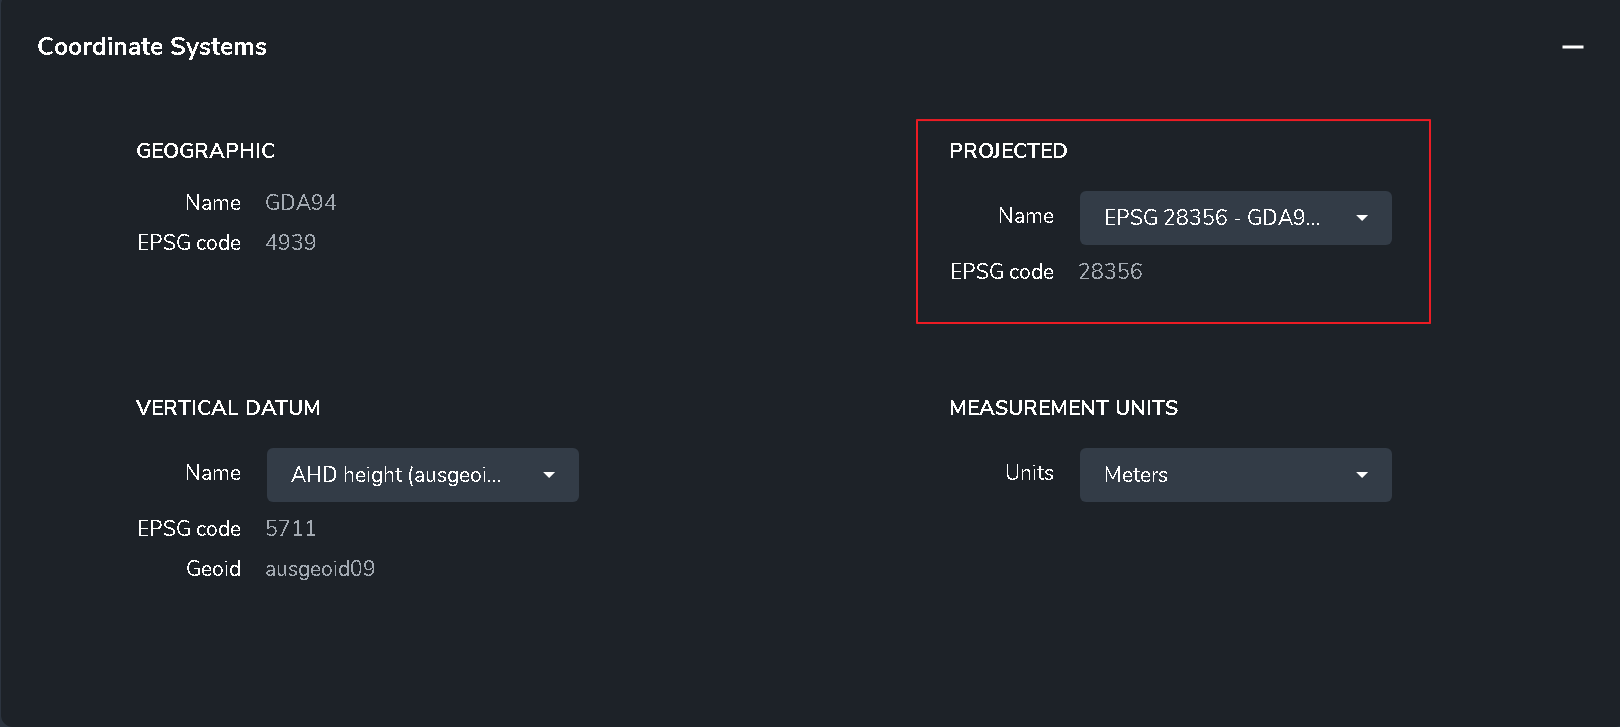
- If you use Trimble RTK, you can check the output coordinates system in the Trimble.
Steps to add/change EPSG in PhenoCopter
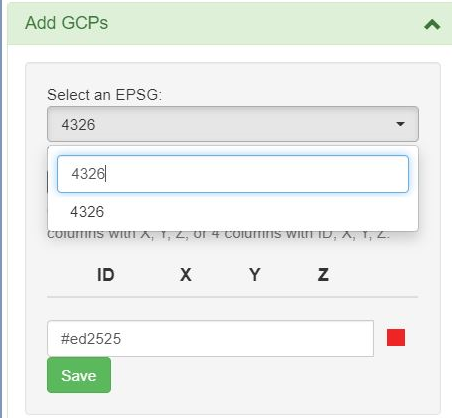
- Click on the
Select an EPSGto show the dropdown menu and search input. - Start to type the EPSG in the search input. The available EPSGs are listed if the input chapracters are not less than 4.
- Select your EPSG in the list to confirm.
Import CSV file
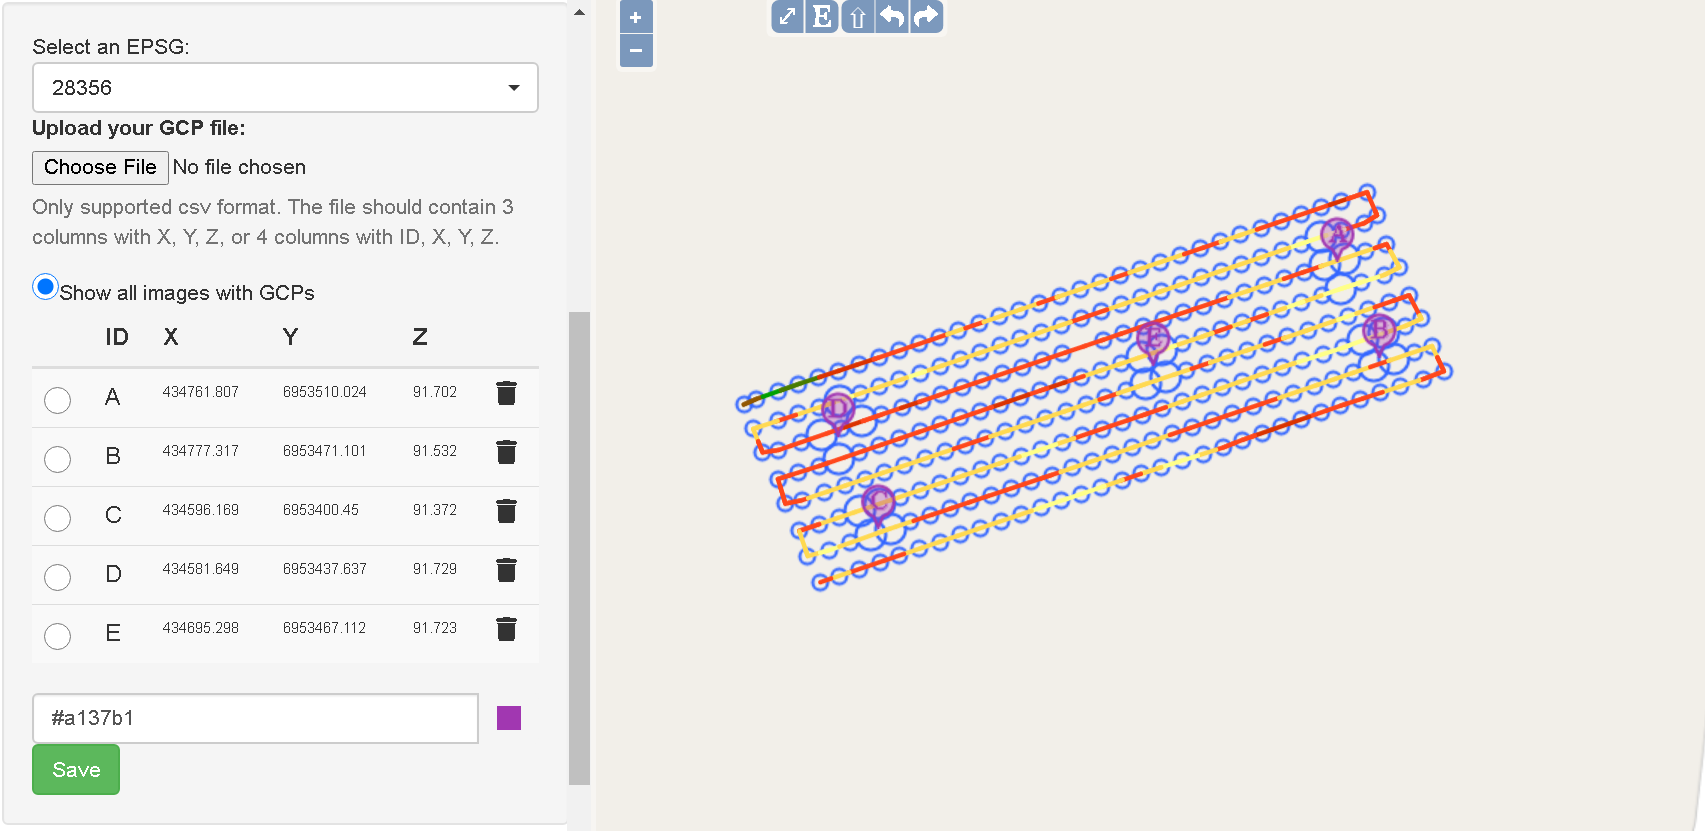
GCPs can be upload into PhenoCopter from a csv file. Currently we only support csv file with three/four columns.
- For csv file with three columns: X, Y, Z or longitude, latitude, elevation
- For csv file with four columns: id, X, Y, Z or id, longitude, latitude, elevation

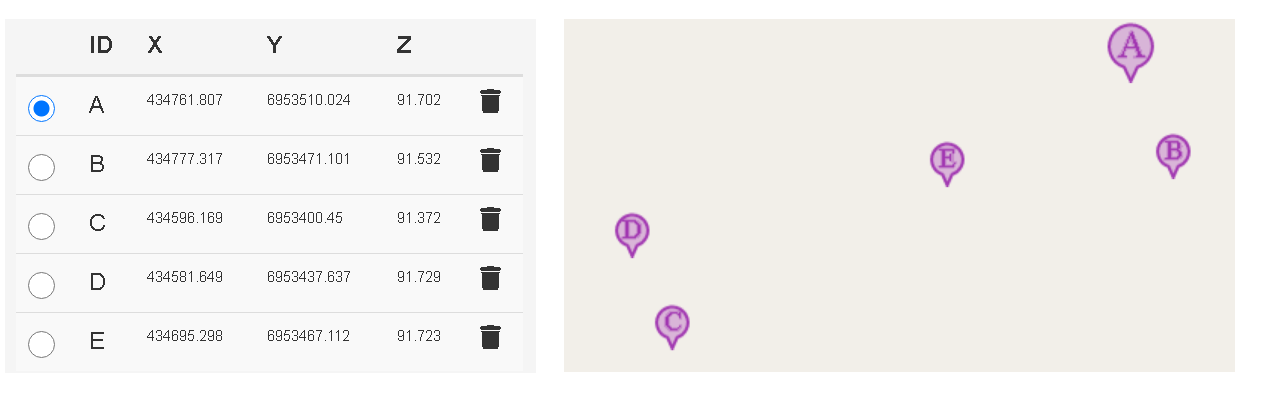
After CSV file imported, the GCP markers are listed in the Add GCP panel and shown on the map. The GCPs are named from A to Z with the order in the csv file. The color of GCP can be adjusted and stored into PhenoCopter through the color box at the bottom of GCP list.
Add or delete GCPs on the raw image
Add new GCP on the raw image
- Select a GCP in the GCP list. The corresponding marker on the map will be highlighted with larger size.
- Click the point on the flight path which is close to the selected GCP to open the
image viewer. Make sure
Raw imageis selected in the layer selector of top-right corner as there are multiple types of images are generated during data processing.
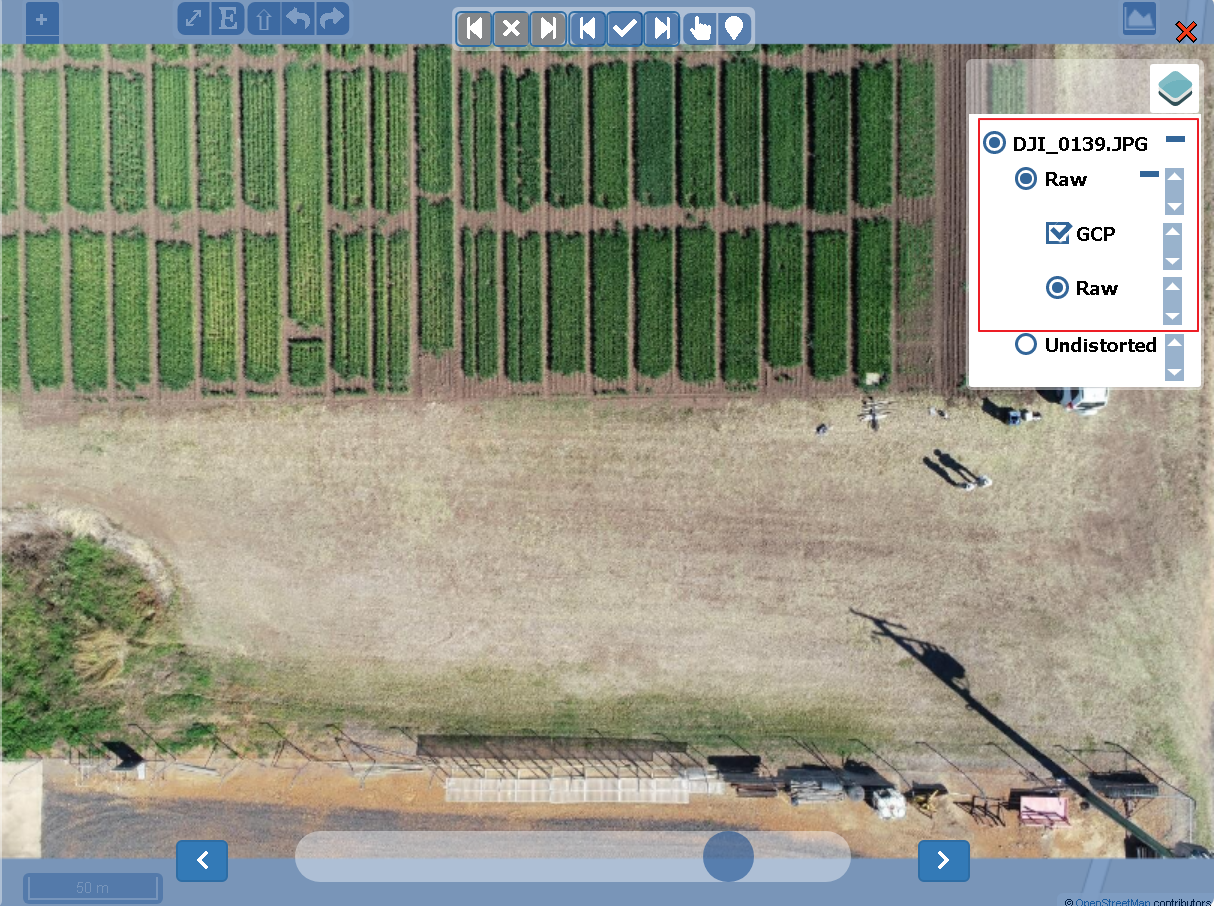
- Using the zoom feature (middle mouse button, toolbar at the bottom, or double click of left button of mouse) to zoom into your GCP.
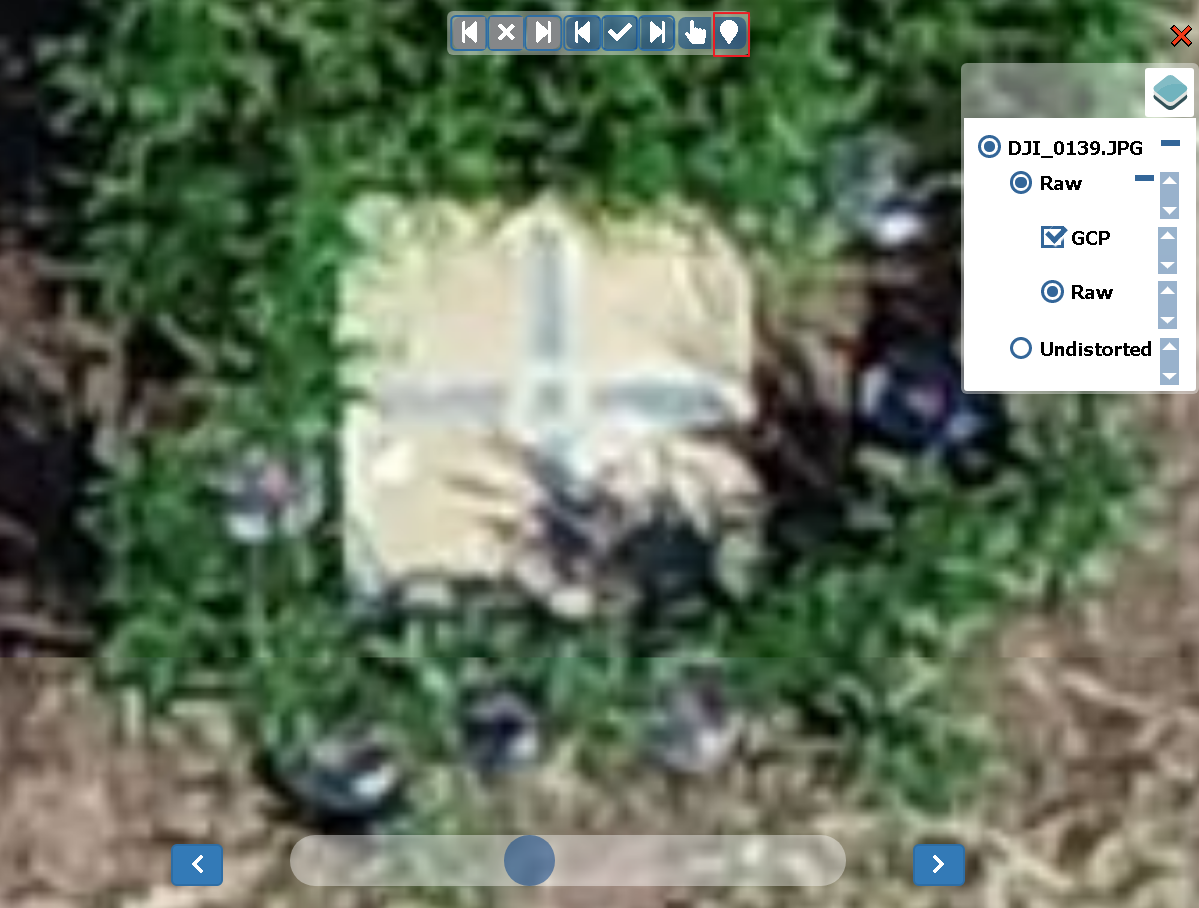
Click the tool
Add a point as GCPat the top of map (the last item at the toolbar, red circle at the figure above), then mouse will transfer into a blue point.Click the center of GCP (or the measured point at GCP) to add a new GCP. A new marker is created at GCP using the same symbol with selected GCP.
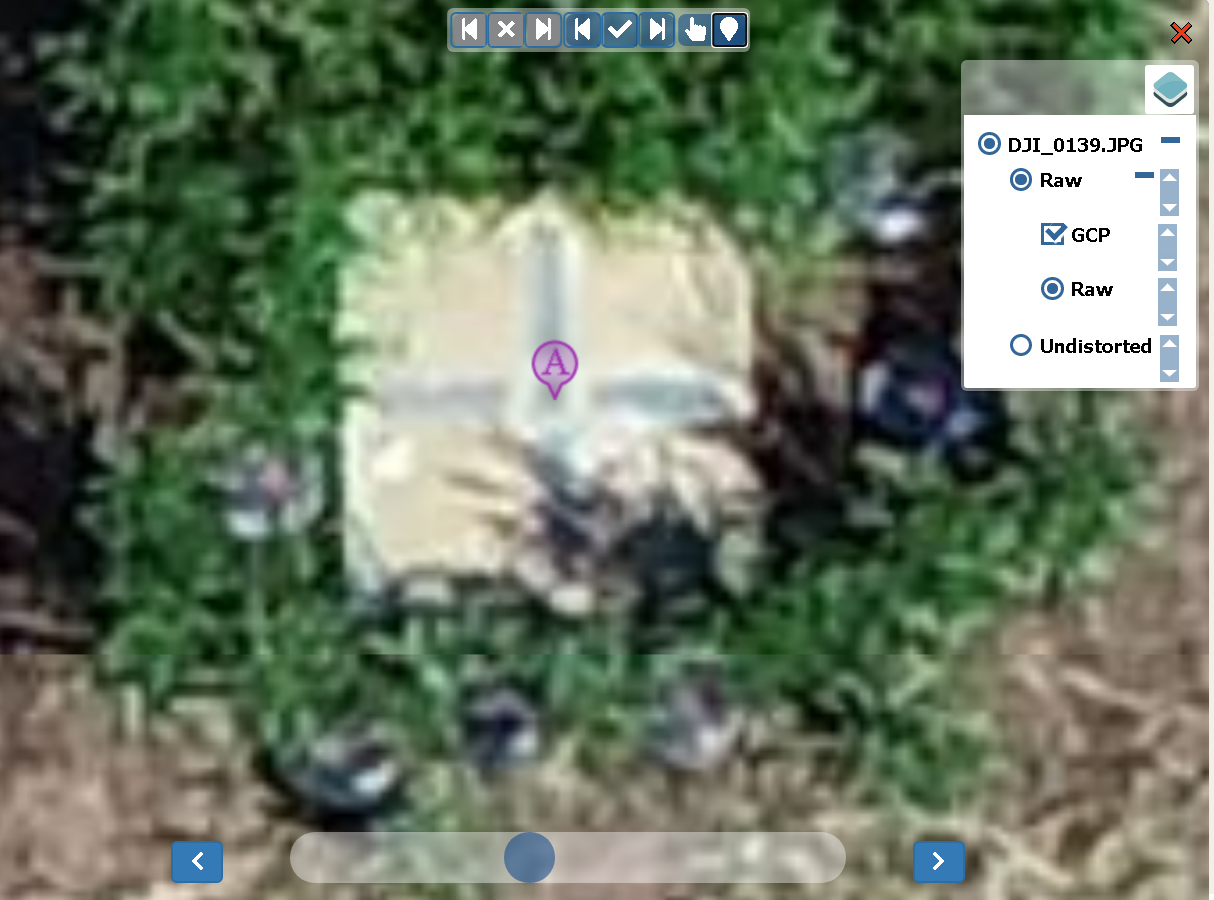
Switch another images to add the same GCP through 1) closing the current image and open another one, or 2) clicking the previous and next buttons at the bottom of map.
Repeat the above steps for other GCPs and add GCP on a minimum of 2-3 images
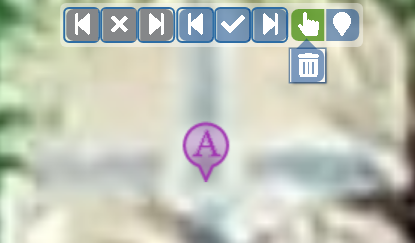
Modify or delete GCP on the raw image
In Step 4 above, click the tool Modify or delete GCP at the top of map.
- Click on marker to select GCP.
- Hold down the mouse left button and drag marker to move GCP.
- Click the delete button at the toolbar to delete GCP.
Workflow
This workflow Add GCPs is a manual step and can be skip if the flight don’t have any GCPs. This step has to be Mark as Finish when all GCPs are added.